Creating high-quality content at scale is challenging—but the Template Builder makes it easier. By turning your team’s strategies and best practices into reusable templates, it ensures consistency, saves time, and keeps your brand’s voice intact
Beyond Anyword’s built-in collection, you can create templates for press releases, FAQs, event emails, newsletters, case studies, and more. Whatever the format, your team can rely on them to deliver quality results every time.
How to Create a Template, Step by Step
Step 1: Access the Template Builder
To create a new template, navigate to the Template Builder from the right-side menu and click “Create new”.
Step 2: Select the Editor
Choose the editor to work with:
-
Short-form editor — best for quick assets with fewer sections (like ads, emails, and social posts), or multiple assets for a single goal (such as a set of ads or posts).
-
Long-form editor — best for longer, structured pieces divided into multiple sections (like blogs, landing pages, or multi-section content).

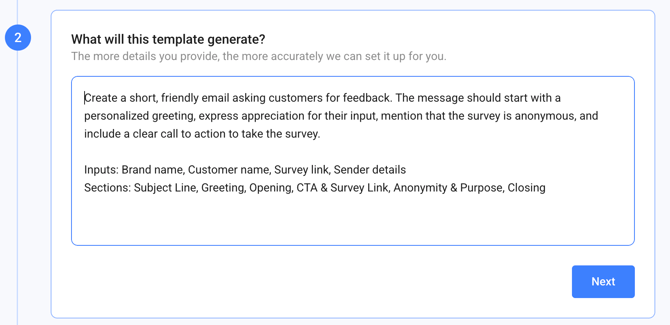
Step 3: Write the Brief
Describe what the template should generate. This free-text description defines the purpose, the type of content, and the structure it should follow.
-
Include the type of content (e.g., “product launch email”).
-
List the inputs you want the template to request (e.g., product name, launch date).
-
Outline the sections or structure (e.g., subject line, subheading, body).
Tip: Write clear, detailed instructions. The more guidance you give, the more accurate the generated structure will be.
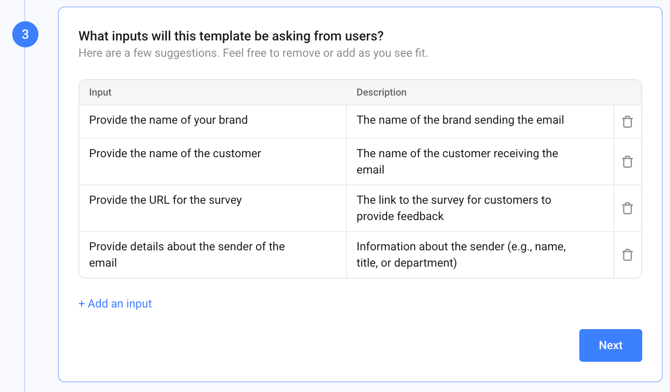
Step 4: Review Inputs
The Template Builder generates suggested inputs with descriptions.
Here you can:
-
Add or remove inputs.
-
Edit names and descriptions for clarity.
-
Make sure inputs match what your team will need.
Tip: Avoid too many inputs. Unless necessary, keep it between 2–6.
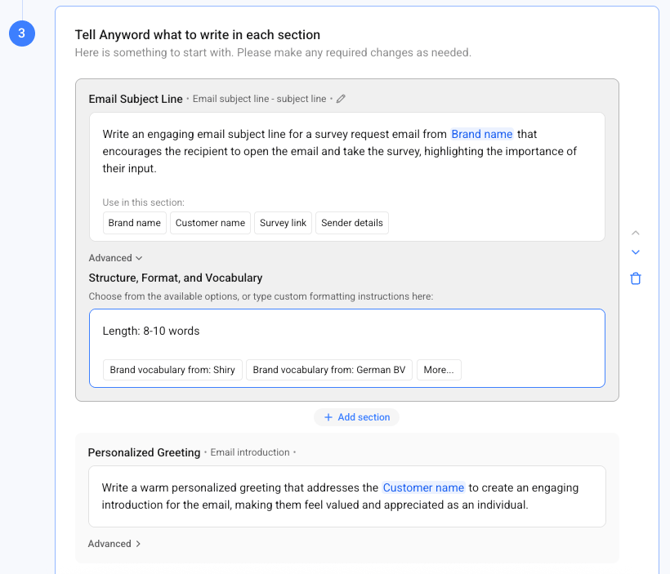
Step 5: Review Section Prompts
Each section is generated from your brief and inputs. This is where you fine-tune how Anyword will create content for each part of your template.
At this step, you can:
-
Edit the wording and tone of each section prompt.
-
Adjust how inputs are referenced within the section prompts.
-
Add, remove, or reorder sections to match your preferred flow.
-
Change the section type (for example: email headline, subheading, or body). Changing the type also affects scoring of the generated content.
-
Edit the Structure, Format, and Vocabulary settings to control how each section is styled or formatted (for instance, choosing H1/H2/H3 styling or adding custom formatting instructions).
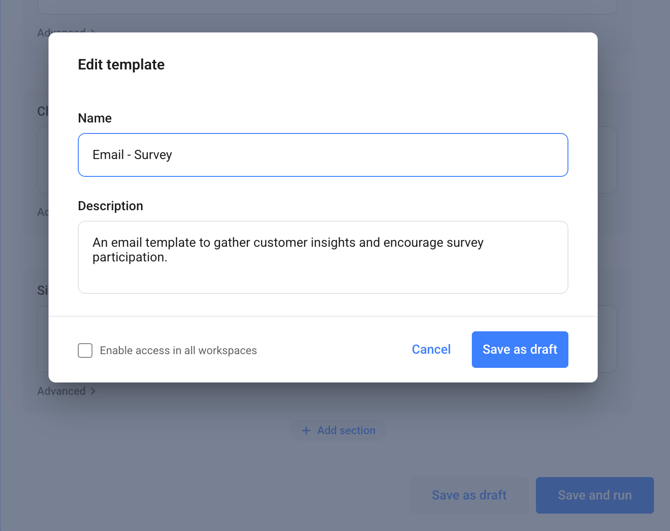
Publishing Your Template
When you’re ready, save your template as a draft or publish it.
-
Give your template a name and description.
-
Best practice: include the channel (e.g., Email, Ads, Landing Page) and the use case (e.g., Webinar Reminder, Product Launch) so it’s easy to find later and for others to understand its use and purpose.
-
-
Click Save as draft or Publish and run.
Testing and Refining
After publishing, test the template by filling in the inputs and generating content. Review the results and make changes as needed.
-
Adjust inputs, prompts, or sections until the output is consistent and high-quality.
-
Templates rarely perform perfectly the first time. Expect to refine them multiple times before they deliver reliable results. If you run into issues, contact your CSM for help.
Best Practices
-
Start with a simple template for a short, easy piece of content before building complex, multi-section ones.
-
Write specific briefs: vague descriptions lead to weaker prompts and sections.
-
Refine multiple times: iteration is key to producing reliable, reusable templates.