Creating long-form content in Anyword allows you to generate structured, high-quality articles, blog posts, or reports that align with your brand voice and performance goals. The Long-Form Editor is designed for producing in-depth content divided into multiple sections, with full control over structure, tone, and format. In this guide, you’ll learn how to start a new project, set up your prompt and references, customize generation settings, review outlines, and refine each section for the best possible results.
Step 1: Start a New Project
To create a long-form content project:
-
Navigate to your homepage.
-
Click + Create content in the upper right corner or + New black project button under a prompt window.
-
Select Long-Form Editor.
You’ll now land on the long-form editor workspace — designed for structured, multi-section content such as blog posts, articles, or white papers.
Step 2: Write Your Prompt
In the main prompt field, describe what you want the AI to generate.
This can include the purpose, topic, and desired structure of your content.
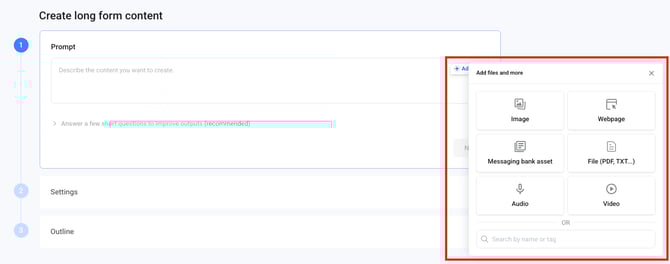
You can also attach reference materials that will guide generation. Supported file types include:
-
Text or document files:
.docx,.pdf -
Images (for visual references)
-
Webpages or URLs
-
Messaging Bank assets
-
Audio or video files
You can also search and attach existing resources you’ve used before in your workspace.
These attachments help Anyword’s AI understand your context and generate more accurate, relevant copy.
Step 3: Answer a Few Short Questions (Optional)
After you enter your initial prompt, you’ll see a section labeled
“Answer a Few Short Questions to Improve Outputs.”
Here you can:
-
Review suggested titles for your piece.
-
Answer custom questions automatically generated from your initial prompt — for example, about target audience, main benefit, or tone preference.
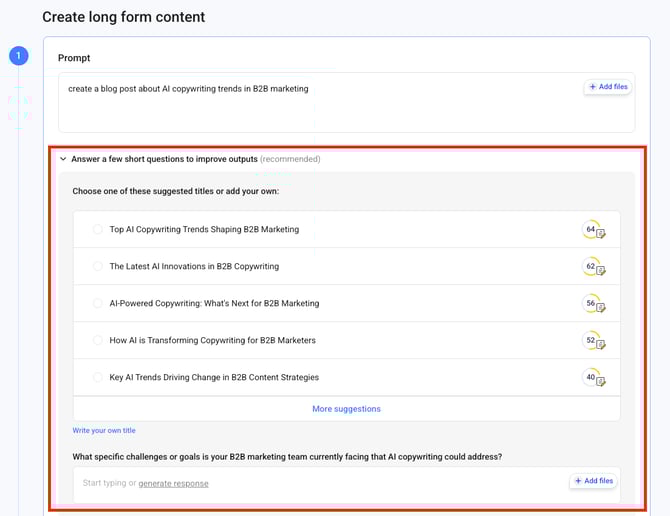
Answering these is optional, but it helps Anyword produce more tailored and higher-performing content.
Click Next when ready.
Step 4: Configure Your Settings
In Step 2: Settings, customize how your content will be generated.
You can define:
-
Language of the output
-
Content length (short, medium, or long)
-
Tone of Voice — either choose from presets or apply your Brand Voice
-
Target audiences or personas
-
Formatting options (headings, structure, emphasis)
-
Messaging Bank items and Brand Vocabulary
Once configured, click Next to continue.
Step 5: Review the Outline
In Step 3: Outline, Anyword automatically builds an outline showing all planned sections of your article.
You can:
-
Add or remove sections
-
Adjust structure, tone, or format and vocabulary per section
-
Define styling instructions (e.g., use H2 for section titles, apply bold to key phrases)
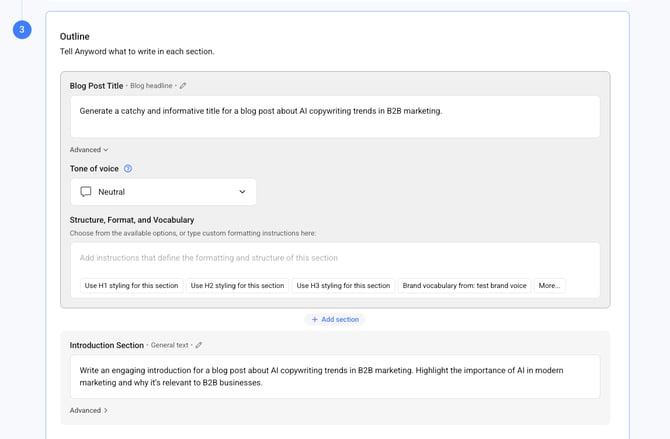
When satisfied, click Generate.
Step 6: Generate Your Content
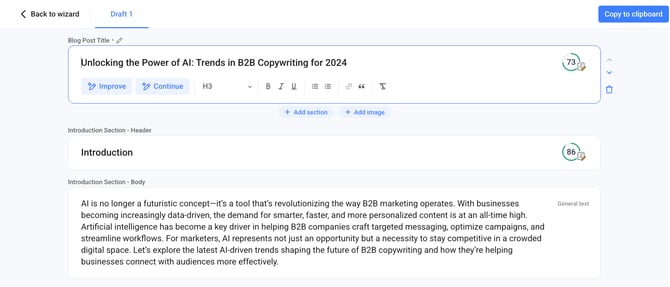
Anyword now produces a complete draft based on your prompt, references, and settings.
The generated result appears in a structured draft view, with each section displayed separately — this is what distinguishes the long-form editor from the short-form one.
You can:
-
Edit each section individually
-
Improve sections using the Improve button and choosing from:
-
Improve performance
-
Improve performance but keep structure
-
Make more casual / Make shorter / Make longer
-
Change tone of voice
-
Add your own instructions
-
You can also format text using:
H1–H3 styles, bold, italics, underline, bullet or numbered lists, hyperlinks, block quotes, or clear formatting.
Step 7: Explore Scores and Insights
Each section includes a score in the top-right corner.
Hover and click the score to open the Insights tab, where you can review predictive performance data and improvement suggestions.
🔗 See Understanding the Insights Panel for details on interpreting content scores.
Step 8: Add or Adjust Sections
You can:
-
Add new text or image sections
-
Move sections up or down to change order
-
Delete sections no longer needed
Step 9: Finalize and Export
When your draft is ready:
-
Click Copy to Clipboard in the top-right corner to paste your content into another tool (CMS, blog, email, etc.).
-
To save the project, click the pencil icon in the upper-left corner, name your project, and select a destination folder.
Your content will be saved in the selected workspace folder for future access.
Tip
You can always return to a saved project to improve or regenerate specific sections later — all insights and settings remain stored with your document.